This is the trim:

Here is a quick how to:
First, cast on 4 pegs:
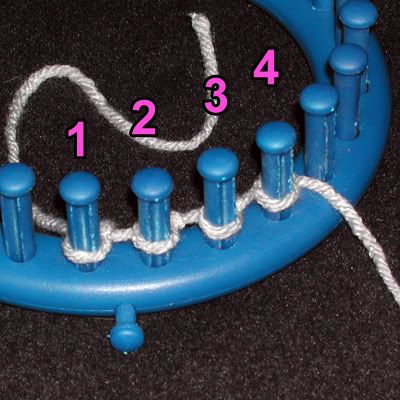
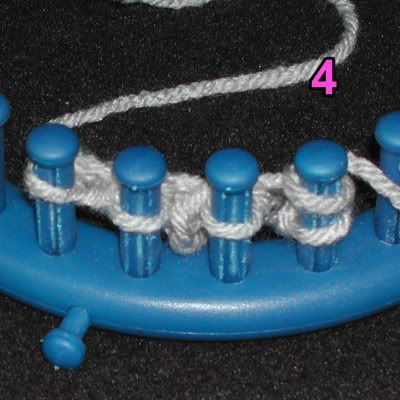
Knit off the 4th peg about 6 times
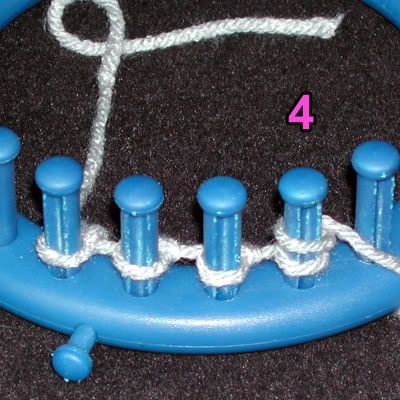
It should look something like this after the 6th knit stitch:
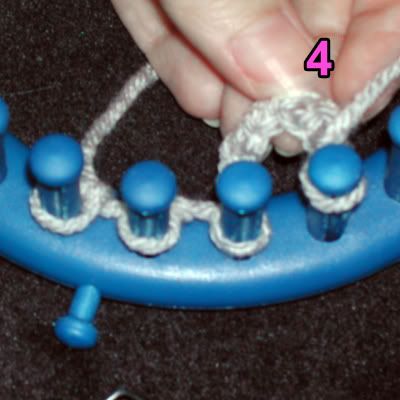
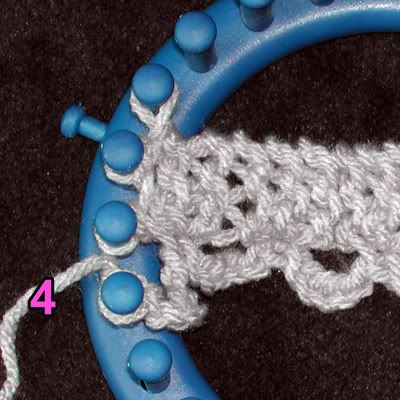
Here is the back for a better look:
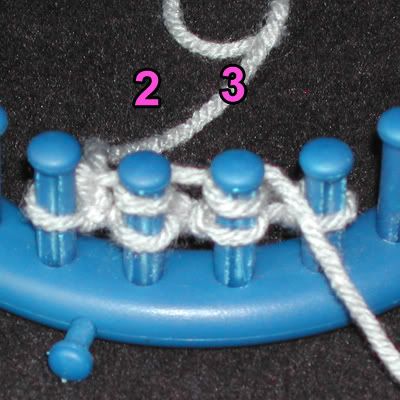
Now, bring the yarn in front of 3rd peg and purl to the left pegs 3,2,1

Knit right pegs 2 & 3
Repeat the purls left 321 & the knits right 2 & 3 about 3 times
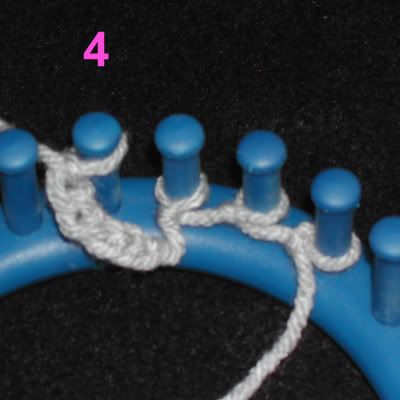
Return to 4th peg and repeat knit offs.
It should look like this after the knit offs:
Continue this pattern until desired length.
The original post is here.


http://i0905.hizliresim.com/2009/5/31/4390.jpg sevgiler
ReplyDeletemine turned out crappy :-(
ReplyDeleteSorry to hear that, Anon. What exactly looks bad about it? Tension was a big hurdle for me. Took a lot of practice to keep it even while working. Share a pic and I'll see if I can help.
ReplyDeleteMieljolie
Really need to try this. Have you used it in any of your projects? I'd love to see how it looks as part of a finished piece
ReplyDeleteThis is really cool...can't wait to try it.
ReplyDeleteThank you SO much for posting a picture tutorial!! I'm new to looming and some of the written instructions are difficult to understand!! I can't wait to try this!! It's so beautiful!
ReplyDeleteI am new to knitting crocheting and using a loom. I wish you had a video of this. I really want to add this to a baby blanket. Thanks for sharing your expertise. If you ever have time to share a video of this beautiful edging many of us would be inspired!
ReplyDeleteOne of these days I hope to delve into video. I'll post here if I do. Thanks for commenting. I hope the pics might help out a little until then.
DeleteThank you! Bought my loom tonight I'm goo a give it a try tomorrow! I will let you know if I have any questions! So excited������
DeleteIf you put the end of the yarn through a short piece of drinking straw, it will be easier to manage.
ReplyDeleteHow can I make a long one for around a blanket
ReplyDeletePlease make a video
ReplyDeletethe photos re really fuzzy, and I can't see anything through the photo bucket label...do I need to update some setting or other to see these?
ReplyDeleteI used this tutorial to create some really fun flowers. I wish I could share a photo, but it's on my Facebook and Instagram with a link to your page here.
ReplyDelete👍🌻🤗
ReplyDeletePlease make a video..
ReplyDeleteHola podría pasar un video porque soy una persona grande y estoy aprendiendo con video soy de Argentina
ReplyDelete