Monday, January 26, 2009

Knitting Gloves

Inspiration struck this morning when I awoke. I thought of a way to knit gloves from the fingertips down on my adjustable loom without having to remove the stitches from the loom.
Photobucket

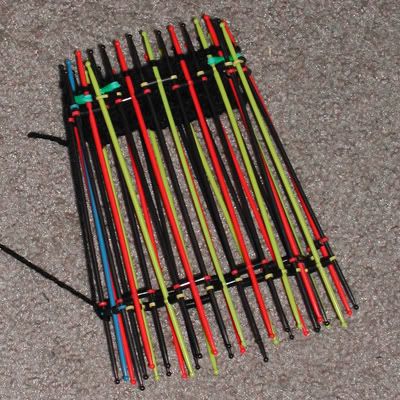
Let me explain. Here is the loom open as normal.
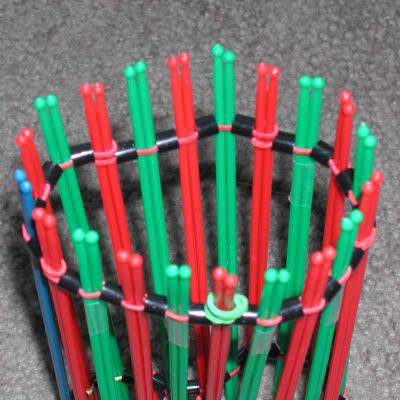
Photobucket

I closed off the pegs where the finger holes would be using a small rubberband with a spacer bead on it for each side of the fingers.
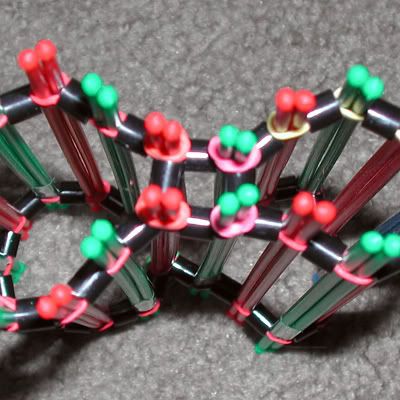
Photobucket

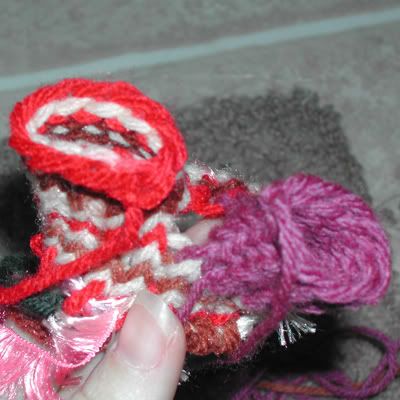
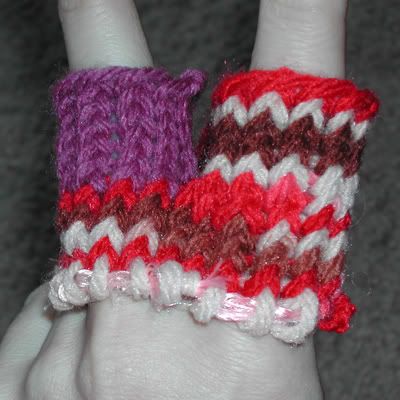
I knitted the fingers with separate yarn until the finger was the desired length. Slipped the stitches off of the inside pegs and placed them on the pegs on each side of them. Then, I removed the rubberbands I used to close the loom and replace the stiches Finally, I just knit around the entire loom like normal.

Please forgive the two different colored yarns, only two fingers and the fact I didn't tie anything off. The only real problem I'm facing is the hole between the fingers. I've been informed that this is nornal for knitted gloves, but I could probably close the hole by sewing it shut with the tail from each finger.
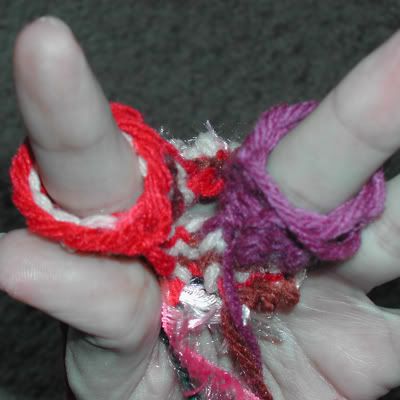
Photobucket
Photobucket

To make the rest of the glove would be indentical to the above. The thumb could also possibly be done the same way by leaving space on the loom for it and starting it further down.

If anyone has any suggestions to fix the holes between the fingers, I'm all ears.

Monday, January 5, 2009

Advantages of the Flexible Loom

Over Standard Looms and Boards:

  • Compact - it is more portable than the knifty knitters or other wooden knitting boards and looms. Mine can be rolled up with a project on it without destroying it. Yet, when working on small projects, it will still sit upright on my lap or a table.
  • Inexpensive - it's really cheap to make and doesn't take too much time or effort to assemble. No woodworking skill required or special parts to order.
  • Resizable - It's customizable for each size project with minimal effort. And, can be broke up into two looms for projects in pairs like socks.
  • Adjustable Gauge - I can change the gauge by changing the peg size or simply by adding a couple spacers between the pegs. No more large/extra large gauge only Knifty Knitter projects for me!
  • Increase/Decrease on the fly - I can increase/decrease at any peg on the loom. Try that on a Knifty Knitter! Even the knitting boards can only increase/decrease on the ends unless you move each loop down the loom each time. May not mean much for most projects, but it definitely makes it more versitile. Should be great for cables and such.
  • Double-knit - You can change the shape of the loom with a project attached to it, which is pretty cool. You could switch from knitting in-the-round to double-knit and back in a single project.
  • Gussets - Now gloves and other items requiring gussets are faster and easier. You can knit them continuously all on the same loom.
  • Also great for making i-cord, small projects like spool-knit, or even use it as a peg loom for rugs.


hat and loom

More Pick-Up Stick Loom Experiments

Here is an earlier attempt at "pick-up stick" loom showing what it looks like in the middle of some decreasing:
Photobucket

Here is the results.

Photobucket

Photobucket

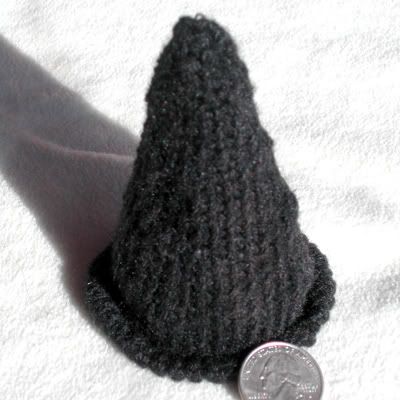
I made a cone hat for my daughters doll. It was mostly an experiment in decreasing on the loom. I removed 1 peg at several points equally all around the loom after every 9 rows. It is pretty small and I used black yarn, so it's really hard to see the decreases.

Once I started building it with 2 sticks together, I tried a sample starting in 1 over 2 and switching to regular 1 over 1 on the top. I eventually made an adult size of this pattern, but failed to take a pic before it dissappeared.

Photobucket

Blog Widget by LinkWithin